Thursday, November 5, 2009

Using SFC (System File Checker)/Scannow

System files can sometimes get written over or deleted.  SFC (System File Checker) scans your Windows XP system and replaces the missing files.  Missing system files can cause startup/boot problems or other operating system headaches.  SFC is part of the WFP (Windows File Protection) feature that prevents programs from writing over critical system files.

I was once working on a computer that was having a startup problem, ran the command line utility SFC /scannow, and voila!  Problem fixed.  SFC scans the system and determines if there are any missing files.  If so, the files are obtained from cache (%systemroot%\system32\dllcache).  If not in cache, SFC will obtain the files from the installation source on the network or the Windows CD-ROM.  You might be asked to insert the Windows Installation CD-ROM.

To use the SFC utility:
  1. Go to Start;All Programs;Accessories;Command Prompt
  2. Type SFC /scannow and press Enter (there is a space after SFC)
  3. If prompted, insert your Windows XP Installation CD-ROM.
  4. Wait until command finishes and your files are verified.
Enhanced by Zemanta

Monday, October 19, 2009

Using System Restore

A very good safety tool in Windows XP is System Restore.  It is seldom utilized, but is very effective and is a small step that can save you an enormous amount of trouble.  If your computer is not working properly, you can use System Restore to return it to a previous state.  If you are getting ready to install or download an application, use System Restore to back up your system so that if you have problems and the application isn't working as anticipated, you can restore your system.

Note:  To use System Restore, you must be logged onto your computer as an administrator.  If you do not know if you are logged onto the system as an administrator, check out the following link to find out:

http://support.microsoft.com/gp/admin

To turn System Restore on or off:

  1. Go to My Computer.
  2. Right click.  Go to Properties.  Select the System Restore tab.
  3. Clear the checkmark to turn on System Restore.  Insert a checkmark in the box indicating to turn System Restore off.
Creating a Restore Point:

  1. Go to Start/All Programs/Accessories/System Tools/System Restore.
  2. Select the Create A Restore Point option and click Next.
  3. Type a description like, "Before printer driver install", and click Create.
  4. Click Close.


Revert to your Restore Point:

  1. Go to Start/All Programs/Accessories/System Tools/System Restore.
  2. Select Restore My Computer to An Earlier Time option, and click Next.
  3. Use the calendar to select the restore point you want to go to.  Days in bold contain the valid restore points.  After you select the day, select the restore point listed on the right.  Click Next.
  4. Make sure this is the correct restore point and click Next.  Windows restores to the selected backup and restarts.

Thursday, September 24, 2009

Problems with your mouse pointer?

Mouse Arrow, Computer, Screen,Image via Wikipedia
If you are having problems with your mouse pointer in Windows XP, try to adjust the hardware acceleration. Adjusting the hardware acceleration will allow you to set the way Windows works with the video card and driver.  A lower setting might be needed if the video driver cannot exchange information with the video card and the Operating System at an accelerated rate.  Go to Start/Control Panel.  Click on Display.  Then, select Settings and Advanced.  Next, select Troubleshoot and adjust Hardware Acceleration.  Hardware Acceleration should be set to Full if your computer has no problems.

You will need to experiment with the setting to see which one works best.  First, adjust the hardware acceleration one notch to the left.  This setting might resolve your mouse pointer problem.  Restart your computer and test before adjusting again.  Do not adjust all the way to the left as this could give you unpredictable results.
http://disneyinteractivestudios.custhelp.com/app/answers/detail/a_id/2729
Enhanced by Zemanta

Saturday, September 12, 2009

Free up space on your hard drive

Screenshot of Microsoft's chkdsk.exe (NT versi...Image via Wikipedia
Your computer is running low on disk space and causing it to respond slowly.  You want to know what files are not needed so you can free up space on your hard drive.

You should be able to delete all files with .CHK or .TMP extensions.  Files with .CHK extension are created by the Check Disk (Chkdsk) utility, which allows you to examine a hard disk for errors.  Files with the .TMP extension are temporary files.  Sometimes temporary files are not deleted, as in the case of system failures.

You should not delete files with the .EXE or .COM extension.  These are executable files that run programs.

You should not delete files with the .OCX or .DLL extension.  .OCX files are ActiveX controls and .DLL files are dynamic link libraries.  Both types of files are loaded by executable programs.

You should not delete files with the .SYS extension.  These are system driver files.  They are required to enable the operating system to communicate with hardware devices.

Disk Cleanup is a Windows XP tool that searches for files you can safely delete.  See the link below to see how to use the Disk Cleanup tool in Windows XP.

http://support.microsoft.com/kb/310312
Enhanced by Zemanta

Wednesday, August 26, 2009

Need a Windows XP tuneup?

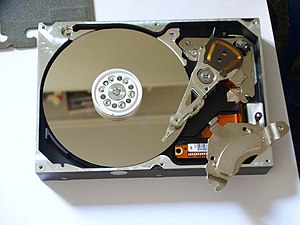
Opened hard drive with top magnet removed, sho...Image via Wikipedia
Defrag your hard drive


The more you use your computer, the more the files become fragmented and spread around your hard drive in bits and pieces.  The more fragmented your hard drive is, the slower the performance.  Defragging your hard drive consolidates the pieces into single contiguous sections or blocks for faster access.

Windows has a free Disk Defragmenter.  You might want to run the defragmenter before you go to bed as it takes a long time to complete.  You should be logged on as an Administrator.

Go to START, then ALL PROGRAMS, ACCESSORIES, SYSTEM TOOLS, DISK DEFRAGMENTER.  Highlight the hard drive you want to Defrag, usually the C: drive.   If you have more than one drive, you can defrag them all, but only one at a time.   Press the Analyze button and Defrag will tell you whether or not the drive needs to be defragged.  Click on the Defrag button to begin the  Defrag process.

You should do this at least once a month.  More, if you are a heavy pc user.

For alternate methods of using Disk Defragmenter, check the Microsoft Knowledge Base below:

http://support.microsoft.com/kb/314848
Enhanced by Zemanta

Monday, August 24, 2009

Check your hard drive for errors

It is smart to do a thorough check of your hard drives once in a while.   Click on My Computer.  Next, right click on your drive (probably the C: drive).  Click Properties.  Then, click on Error-Checking.  Next, Click the Check Now button.

You must be logged in as an Administrator.  All files must be closed, so you might receive a message from XP stating that the chkdsk will run the next time Windows starts.

Chkdsk could take a long time to run depending on how large your hard drive is, so it is best to schedule it accordingly, like before you go to bed.

For more information on Chkdsk, see the following link:

http://support.microsoft.com/kb/315265
Enhanced by Zemanta

Friday, August 21, 2009

Touchpad not working on Lenovo laptop.

Last night my daughter asked me if she could borrow my laptop to check her Facebook for five minutes.  She suddenly started complaining about the mouse being frozen.  I was not surprised because the Synaptics Alps touchpad on this lenovo notebook has always been a problem.  The problem is more with the sensitivity.  No matter how I adjust the settings, the pointer is too sensitive and ends up being somewhere else on the page from where I am typing.

That was not the problem my daughter was currently having, so after surfing the net for a few minutes, I found the solution.  If you have a similiar problem, try this before you spin your wheels looking for another driver or something more time consuming. It worked for me, like a charm.

There is a small touchad on the laptop right above the Pause/Break key on the top right hand side (right above Backspace key).  This touchpad turns the main mouse pad on and off.  It is to the right of the N 500 logo and the touchpads for the volume controls.  Push that and voila!  You now have an activated mouse!

I found the solution at this link:

http://www.fixya.com/support/t2621356-touchpad_not_wirking


Enhanced by Zemanta

Thursday, August 20, 2009

Windows XP and Windows Server 2003 System File Checker (Sfc.exe)

BEIJING, CHINA-OCTOBER 23: A woman holds the n...Image by Getty Images via @daylife
System File Checker is a very useful tool when the Windows operating system is having problems. The utility replaces corrupt or missing system files. It retrieves the correct version of the file from the hidden cache folder contained in the %Systemroot%\System32\Dllcache or the Windows installation source files and replaces the problem file, if it finds one.


Sometimes you are able to fix your system problems very quickly without much effort, just by running the sfc.exe scan utility. I highly recommend you try this before resorting to a Windows reinstall or other drastic measures. Click on the link below for detail instructions on how to use System File Checker. 

http://support.microsoft.com/kb/222471

Another link that explains the sfc.exe utility in even greater detail and lists problems and questions in a user friendly format is the link listed below:

http://www.updatexp.com/scannow-sfc.html


Enhanced by Zemanta

Tuesday, August 18, 2009

Troubleshoot TCPIP connectivity with Windows XP

Useful tools to determine the cause of your Internet and Network connectivity problems for Windows XP.

http://support.microsoft.com/kb/314067

Understanding TCP/IP addressing and subnetting basics

Monday, August 17, 2009

Plug and Play services causing Windows slow startup

When you start the computer, it now takes 20 minutes to complete the logon process. Once the computer is started, you cannot use any hardware connected to the computer. You discover the Plug and Play service is stopped, but you cannot get it started.


Explanation:

The Plug and Play service is the basis of all Windows services and must be running to have a stable system. However, once Windows is started, the service cannot be started.


First, you should start the computer from a bootable Windows XP Professional CD-ROM. Enter the Recovery Console before Windows starts. Enter R to repair the installation when the Welcome to Setup screen appears.


Choose the Windows installation to repair and enter the Administrator password.


You will be taken to the command prompt. At the prompt, type ENABLE PlugPlay SERVICE_AUTO_START. This command configures the registry to start the Plug and Play service automatically right after Windows starts but before the logon process. You should then restart the computer by typing EXIT.

Monday, June 29, 2009

Power Users group


  1. John cannot manage a local printer on his computer. The computer runs XP Pro and is part of an Active Directory. After speaking with John's manager, you determine John should be able to manage the printer and share documents on his computer. But, he should not be able to install printer drivers. Which logical group should you add Patrick to?
Power Users. This group is granted permission to manage printers and shared documents, by default.


        Enhanced by Zemanta

        Thursday, June 25, 2009

        Windows version


        Here are three ways to find out your version of Windows:

        • Go to START/RUN/Winver.exe (Windows version identification)
        • Control Panel/Performance and Maintenance/System (Systems Properties Dialog box)
        • Go to START/RUN/WinMSD.exe (system information program)


        Enhanced by Zemanta

        Thursday, June 18, 2009

        Desktop Management Issues

        Desktop Management Issues

        1.1. Types of Accounts.

        · Administrator Account. Manages computer.
        · System Account. Used by application.
        · Guest account. Exists for purpose of letting a user logon to check email or if they need very little access to resources.
        · Local. Access to one machine
        · Domain. Exists in Active Directory.

        1.2. User Profiles.
        When a user logs on to the computer, it sets up a profile for them. The computer assigns rights and permissions to resources.
        · My Documents folder
        · Shortcut
        · Registry
        · Cookies
        · Favorites

        Rights give you access and are assigned based on group membership. Permissions give you resources and are assigned through groups.

        WINXP has four different accounts:
        1. Computer Administrator
        2. Limited
        3. Guest. Like a Limited Account, but, you can not assign a password.
        4. Unknown. Accounts that were carried over from another OS and Windows does not know where to put them.

        You can create accounts in User Profiles in Control Panel. However, the best way to create accounts is in Computer Management. Then, you can see all of the accounts and groups. Right click My Computer/manage/expand Local Users and Groups.

        To create a new user, right click Users. Double click on the user to see the user properties and what group he is a member of. The network administrator could set the profile path to set the particular computer settings for this user.

        1.3 Resetting Passwords.

        Reset passwords by going back into Local Users and Groups. Right click the user and click Set Password. If you change the password, the user might not be able to gain access to resources. For example, if the password was encrypted. The password might be needed for certain resources. This is usually the case on domain accounts.

        WINXP allows you to backup the password on external media.

        1.4. Fast User Switching

        Fast User Switching can be used if you are not a member of a domain.

        Go to Control Panel/User Accounts/select Change the way Users log on or off/Click Use the Welcome Screen and User Fast User Switching. Note: You must use the Welcome Screen.

        1.5. User Configuration

        You can copy a user profile, if you have a user that needs a similar profile.

        Right click My Computer/Properties/Advanced/User Profiles – Settings

        If you are the Administrator, you should change your account name to something else.

        Highlight the profile you want, click COPY TO.
        Copy to a Profiles folder you create. Enter who is permitted to use this, the computer and user. Click ok.
        * If you need to troubleshoot a profile in a hurry, and the profile has similar rights as the other user, the easiest way to troubleshoot problem, is to copy the profile of someone’s profile who is working.

        1.6. Start Menu, Taskbar, Desktop

        These options are used for customizing the desktop. They are not likely to effect user productivity. They just make them feel more comfortable.

        Right click the taskbar at the bottom of the screen, click Properties.
        · You can Lock or Unlock the taskbar.
        · You can auto-hide the taskbar. This is good if the user has a small monitor.
        · Keep the taskbar on top of other windows. This is a default setting.
        · Group similar taskbar buttons. This gives you one representation with a little number to indicate how many are open.
        · Show Quick Launch. The tiny icons on the bottom of the taskbar on the left hand side. You can add additional quick launch icons by resizing the taskbar and pulling the taskbar when the mouse becomes a two-headed arrow in the quick launch area.
        · Show the clock. You can extend the taskbar by unlocking it and using your mouse to make it bigger, then it will show the day and the date.
        · Hide inactive icons. If you click on customize, you can choose what you want to do with that particular icon.

        The Start menu
        You can choose between the regular and the Classic start menu.
        · The regular start menu has your most recent documents open to make it easier for the user.
        · Classic Start menu is more like Windows 98 or Windows 2000.

        · If you click on Customize you can choose whether you want large icons or small icons in the start menu.
        · You can choose how many programs you want to show on the start menu.

        Desktop configuration is done by right clicking the desktop, click on properties, and you have all the different display properties.

        · Themes
        · Desktop lets you customize the desktop by letting you select what icons you want to display. Recycle bin always displays.
        · Screensaver keeps you from having burnout on the monitor. Flat panel display monitors don’t have that problem. You can indicate whether or not you want the user to enter a password to resume from screensaver.
        · Appearance lets you make minor settings as far as what the user sees, text size, color scheme, effects. Clear type is good for flat panel displays.
        · Settings have to do with the display properties. Advanced settings let you set based on the video card you have.

        1.7. Folder Views
        If folder views are improperly configured, it can keep the user from finding their file or folder.
        My Computer/Tools/Folder Options/View/Advanced settings
        For some users you need to be able to see hidden files and folders, see file extensions, and unhide protected operating system files. Uncheck or check these appropriately. Click Apply.

        1.8. Accessibility Options

        Start/Control Panel/Accessibility Options

        Keyboard.
        · Sticky Keys. Allow you to use the computer by being able to save keystrokes if the user has a disability. For example, ctrl, alt, delete, can be customized for one key stroke. Go to Settings to set up shortcuts to allow the user to use the sticky keys. They can hold down the ctrl key, or the alt or delete key.
        · FilterKeys ignores a brief or repeated keystroke. You can change the settings for the repeat delay.
        · Toggle keys allow you to hear tones when the caps lock, scroll lock, or num lock key is pressed. Settings will allow you to user a shortcut to toggle.

        Sound.
        · SoundSentry shows the person the sounds made on a computer. You can set that to flash for the Active window, the Active Desktop, or the Active Taskbar.
        · ShowSounds can only be used if the programs have the capability by showing a little balloon.

        Display.
        · High Contrast used for a person having a hard time seeing.
        · Curser Options have blink rate and width options.

        Mouse.
        · Allows the user to use the arrow keys on the numeric keyboard to move the mouse pointer.

        General.
        · Controls all of these different settings. How long the accessibility options are on, when they turn on, whether they make a sound when they turn on
        · Serial keys allow alternative access to the keyboard and mouse features. There are additional devices that can by used for the computer by handicapped individuals.
        · Administrative options are how you apply the settings, to the current desktop logon, and/or to all new users.
        Accessibility features are tools built into the operating system.

        Start/All programs/accessories/accessibility options.

        Access the Wizard. Click on next. The wizard will ask you about text size, font size, Microsoft magnifier, disable personalized menus (maybe the font is too small).
        Click next. Select the statements that apply to the particular user, whether they are blind or deaf. The system will set these special settings so the user will not have to set them.
        Magnifier magnifies part of the screen as the mouse moves.
        Narrator allows you to set the system so that the system speaks to you. You set the speed, the volume, the sound. Narrator is a great tool for proof reading documents.

        1.9 Multilingual Configuration

        Windows XP is available in 24 different languages.
        Three different versions of Windows XP:
        · English version
        · Localized version
        · Multi-Language user interface version.

        Regional and Language Options allow you to set the computer for different languages.

        Start/Control Panel/Regional and Language Options

        Regional Options
        When you set the specific language, it converts to the format of that particular region.
        · Number
        · Currency
        · Time
        · Short date
        · Long date

        If what you want is not in the list or regional options, you can Customize Regional Options.

        Languages
        You can add additional languages to the OS. You have to make sure the users have the correct keyboard or keyboard overlay. If the user is having a problem with weird characters showing up on their keyboard, you can check to see if it is set correctly.

        Advanced
        Lets you set non-Unicode programs. For example, if the program says you need to enable a certain code conversion table, you have to go here to enable it. Most of the time you won’t have to set it because the program already has it set.


        Enhanced by Zemanta

        Thursday, June 11, 2009

        Creating an ASR Disk in Windows XP


        The boot.ini file is the file that the OS looks at to determine where the files are to boot the OS. It is in the root of the C drive.

        You should make sure the VIEW is set in Folder Options to see all of the operating and system files so that you can see the boot.ini file.

        Press F8 to access Advanced boot options:
        1. Safe Mode
        2. Safe Mode with Networking
        3. VGA Mode
        WinXP has a tool that allows you to backup the OS to disk. This disk allows you to use this along with the Windows CD to get you back where you were before the system crashed. This doesn't back up data.
        It creates an Automated System Recovery Disk. This allows you to recover from a hard disk system crash. You should create an ASR as soon as you have a system created, especially if you have a complicated configuration.


        • Click START/ALL PROGRAMS/ACCESSORIES/SYSTEM TOOLS/BACKUP/ADVANCED MODE/Automated System Recovery Wizard/click NEXT.


        • Create on floppy or USB external drive.

        If you need to recover, insert the windows CD and the ASR recovery disk at the same time so they can talk to each other.
        Enhanced by Zemanta

        Resolving Printer Issues in Windows XP


        Resolving Printer Issues

        A MCDST needs to know how to install, manage, troubleshoot, and audit printers.


        • Printers are software that includes the drivers.
        • Print Devices are the hardware, the physical equipment.
        • Print Job is the data stream that goes through the computer to the print device.
        • Printer Driver is the actual software that allows the print device to communicate with the operating system.
        • Print Spooler is where the print job goes when it is waiting for the print device. This is the physical location where the job is held before it is printed out.
        • Print Queue is a logical list of all of the jobs that are waiting to be printed.
        1.1 Installing Printers

        START/PRINTERS AND FAXES/ADD A PRINTER

        This brings up Add a Printer Wizard.

        Select the option that describes the printer you want to use:

        • Local printer attached to this computer
        • A network printer, or a printer attached to another computer

        Click Next

        Click Next (one more time to browse for the printers). The dialog box pops up and finds the Microsoft Windows Network, where we can browse to find the printer.

        If you were to install a Local printer (the other option not highlighted, above), another box would pop up after you select that option.

        • Local printer attached to this computer


          √ Automatically detect and install my Plug and Play printer (check this if you already have the print device installed.)


          Click Next.


          Select a Printer Port.

          It defaults to a LPT1 printer port. You also have the option of printing to a COM serial port, or to a file. You could also create a new port, a local port or a TCP/IP port (a port that prints to a particular IP address over the internet).


          Click next.


          Install Printer Software. XP has a cache of printers so we can choose the printer we want. For our example, we are going to use

          AGFA-ACCuSet v52.3.


          Click Next.


          Name Your Printer. For our example, we will call it Printer1.


          Click Next.


          Printer Sharing

        • Do not share this printer
        • Share name:
          Printer1.


          Click Next.

          Location and Comment

          • Location: (the Network Administrators can set up the location so that the users can find printers)
          • Comment:

          Print a Test Page

          Do you want to print a test page?

          • Yes (Recommended if you have the print device connected)
          • No (In this case we will choose no since we do not have our print device hooked up)
          Click Next.

          A dialog box opens up that tell you it is 'Completing the Add Printer Wizard'.

          Name: Printer1

          Share name: Printer1

          Model: AGFA-AccuSet v52.3

          Default: Yes

          Test page: No

          Location:

          Comment:

          Click Finish. The system loads the drivers and creates Printer1.

        1.2 Updating & Troubleshooting Printers

        Right click the Printer/Properties and make changes you need to make.

        Most print devices allow you to print a test page at the device. If you are able to print a test page from the device, then you know the print device is operational.

        If you are able to print a test page from the print device, but you cannot print from the application, then you know the problem is the application.

        1.3 Printer Permissions

        • Print – You can print and delete your own documents from the queue
        • Manage documents – Manage the print device itself, i.e., pause and stop the queue
        • Manage printers – Manage the software settings
        Right click Printer1/click Properties/click Security (allows you to see what users and groups are allowed to use the printer). This will allow you to troubleshoot why a user might be having problems with the printer. The problem could be related to their permissions with the printer.

        Group of user names:
        Administrators
        Creator Owner
        Everyone
        Power Users
        Add Remove
        Permissions for Administrators Allow Deny
        Print
        Manage Printers √
        Manage Documents √
        Special Permissions √
        Advanced
        Administrators have the above permissions. Everyone has the Print permissions. Power Users have the same as Manage permissions for printers.

        For an example, if we 'Add' an Executives Group to the Permissions, we can click Add (above) and type in the Executives Group. However, the Executives already had permissions to print to this printer because they are a member of the Everyone Group. So, if we want only the Administrators, Power Users, and the Executives to have permissions to print to this printer, we click on the Everyone Group (above) and click Remove to remove 'Everyone' from the permissions for this printer. So now, the Administrators, Creator Owner, Executives, and the Power Users are the only ones who have any 'permissions' at all for this printer.

        1.4 Redirecting Print Jobs

        Suppose the user prints and job and the printer is unavailable. You might want to redirect the print job to go to another print device so that it gets printed. For this example, we will use Printer1.

        Right click Printer1/click Properties/click Ports/click Add Port/click New Port/Type in the printer server name and the share name where you want to redirect the print job

        file://printserver/sharename

        Click OK.

        All of the jobs will now be redirected to the new print device.

        1.5 Resetting the Printer Spooler

        If you are having a problem with the print spooler, it probably just needs to be reset. However, it could be that it is running out of space.

        First, we need to determine where the print spooler is.

        The print spooler is for all of the printers, so you need to right click in an open area in Printers and Faxes/click Print Server Properites/Advanced.

        Spool folder: C:\WINNT\System32\spool\PRINTERS (this is were we can make adjustments to where the print spooler is, if needed)

        Log spooler error events

        Log spooler warning events

        Log spooler information events

        Beep on error of remote documents

        Show informational notifications for local printers

        Show informational notifications for network printers

        To reset the print spooler, go to My Computer/right click and choose Manage/go to Services and Applications/click on Services/scroll down to Print Spooler.


        Right click Print Spooler and you can Stop and Restart the Print Spooler. Most of the time resetting the print spooler will clear your problem with the print spooler.


        1.6 Auditing Printers


        In this example, we will refer to Printer1 as the printer name.


        Right click Printer1/Properties/Security/Advanced/Auditing


        We can add the users or groups that we want to audit for this printer.


        If we add Executives, the dialog box will ask us what we want to audit:


        Name: Executives


        Apply onto: This printer and documents


        Access: Successful Failed

        Print √

        Manage Printers √

        Manage Documents

        Read Permissions √

        Change Permissions √

        Take Ownership √


        Let's pretend we want to audit the executives ability to print, so we need to check out and make sure that no one is changing our security in the manage printers permission.


        Click OK.


        To view the results of printer audits, click Start/Run.


        Type: eventvwr.msc


        Press enter.


        You can also get there by going to Administrative Tools.


        The event viewer has three logs by default.

        • Application
        • Security
        • System
        Click on System

        Click on View

        Click Filter

        We are going to Filter by an Event source. Select Print. Click Ok.

        Now, click on Security

        Click on View

        Click Filter

        For the Event source, select Security. For category, select Object Access because we want to know if we are having a problem accessing objects. We notice there are a lot of events that show success. Since we don't need to look at the events that are a success, we go back and click on View/Filter. Then, we uncheck Successful Audits and click OK. Afterwards, you will only see the Failure Audits.


        Wednesday, June 10, 2009

        Resolving File and Folder Issues in Windows XP


        Resolving File and Folder Issues
        Three different types of files users might utilize:


        1. Local – files stored on the local computer.
        2. Shared – files used through a network share.
        3. Offline – files stored on the user's laptop when they leave their place of business. For example, when working a home. Offline files are only available in Windows XP Professional.
        Each file has a name extension. For example, document.doc, tells you this is a work document. .xls is used by Excel. These name extensions go along with applications. So, if a user is having trouble opening up a file, you might want to look at the name extension.


        1. CHANGING FILE ASSOCIATIONS


          Go to the Tools menu in Explorer or My Computer, then Folder Options. Look at File Types. For example, if a user is having trouble opening a Word document, go here and check the file extension for the Microsoft Word document, and make sure it is a DOC type of extension. If not, click on change, and choose the program that should be associated with the DOC type, which is WORD in this case.
          The way you would know this file extension is the problem, is that the user will probably be able to open the application, and then open the file. But, the user is unable to open the application with the file.

        2. FILE AND FOLDER ATTRIBUTES


          Each file and folder has its own attributes. It can be HIDDEN, it can be READ only and unable to be deleted. So, this is a potential troubleshooting area.

          To demonstrate, go to MY DOCUMENTS. Pretend there is a folder with the extension .MSI. Right click on the file. Select PROPERTIES. At the bottom of the GENERAL tab, you have attributes that you can assign to this file. If you click on HIDDEN, and then APPLY, you see that the folder starts to go away. The reason it hasn't completely gone away is the screen hasn't been refreshed. Press F5 to refresh the screen, and the folder goes completely away. The user would not be able to find this file, if the FOLDER OPTIONS are set to DO NOT SHOW HIDDEN FILES AND FOLDERS. That file is now a hidden file based on its attributes.

        3. FILE COMPRESSION


          File compression is using software to take out the redundant elements in a file. For example, if you look at a printed page, the most redundant element is a blank space. There are also words that are redundant, such as 'the' and 'a'.

          Compression reduces performance. Files that are compressed are not used in that mode. The file has to decompress, use the file, then the file has to be recompressed, again. This takes up resources.

          Never compress the Operating System files. This could be a troubleshooting issue. If the system is not performing adequately, it could be the user has decided to compress some files, and compressed some operating system files in the process.

          Don't compress files that are just text. There is no need to. The files you need to compress are audio and picture files. But, you need to make sure the application isn't already compressing the file.

          Don't compress files that are used on a daily basis, because of the resources compression uses. Also, you cannot compress ENCRYPTED files.

          Go to a folder. Right click Properties/General tab/Advanced/Compress contents to save disk space/click OK/click OK. A dialog box pops up to ask you if you want to Apply changes to this folder only, or, to Apply changes to this folder, subfolders and files.

          It is best to compress the folder, not the individual file. If you compress the folder, the files that go into the folder are automatically compressed.

          How can you tell the folder is compressed? It looks the same as the other folders. Go to TOOLS/FOLDER OPTIONS/VIEW/Scroll down and click 'Show encrypted or compressed NTFS files in color'/ click OK. The folder shows up in BLUE. BLUE means compressed.
          Files and Folders moved within the same NTFS volume, retain the compression attribute in the new location.
          Files and Folders copied within the same NTFS volume, lose the compression attribute in the new location, and take on the parent folder compression attribute.
          Files and Folders moved or copied to a different volume, take on the compression attribute of the parent folder.
          Windows XP has a feature called compressed zipped folders. You can create these folders on a FAT, FAT32, or NTFS volume, including floppy disks. Explorer/File/New/Compressed Zipped Folder

        4. ENCRYPTING FILE SYSTEM


          Encryption is very important in today's world. If you lose your laptop, and someone gets access to your hard drive, all they have to do is reinstall the operating system, and make themselves the administrator. They would have access to everything on your computer. Or, they could remove the hard drive and install it into something else to read the data.

          EFS is a service that is available in Windows XP Professional, Windows 2000 Professional, Windows 2000 Servers, Windows 2003 Servers, and Windows 2008 Servers.. EFS encrypts files and folders so that only users with the correct name and password can gain access to that information. What if you have something encrypted, and your key to it is corrupted, you need a backup. The system has a Recovery Agent that creates another key to decrypt the encryption.

          Compressed files cannot be encrypted.

          Go to your folder. Right click the folder/Properties/General tab/Advanced Attributes/Click on 'Encrypt contents to secure data'/ click OK/click OK again. The contents are encrypted. You can tell because the folder shows up in GREEN. This indicates it is encrypted.


        5. NTFS PERMISSIONS
        NTFS File Permission

        Enables Users to :
        ReadView, Open, right-click the file, and click on Properties to view its attributes and ownership

        Read and ExecuteAll tasks described above, plus, double click on the file to open the app that can be used to VIEW it

        WriteAll tasks described above, plus, CHANGE the file and its attributes.

        ModifyAll tasks described above, plus, DELETE the file

        Full ControlAll tasks described above, plus, take OWNERSHIP and thereby give other users permission for the file

        There are two different types of NTFS permissions: File permissions and folder permissions. The default permissions for users is READ AND EXECUTE.

        List Folder contents

        View the folder, click on the folder and VIEW the files and folders with in the folder.
        ReadAll tasks described above, plus, right click the folder VIEW its permissions, attributes, and ownership

        Read and ExecuteAll tasks described above, plus, double click on the folders within the folder to view their contents (traverse the folders, i.e., go to folders within folders)

        WriteAll tasks described above, plus, create new files and folders within the folder, CHANGE the folders attributes

        ModifyAll tasks described above, plus, DELETE the folder

        Full ControlAll tasks described above, plus, take ownership of the folder and thereby give other users permissions for the folder

        Most of the time, permissions are assigned to a user, based on group membership. So if a user is assigned to multiple groups and each group has different permissions, how do we determine the actual effective NTFS Permissions?
        Windows XP has something called Effective Permissions, allows us to determine what the system is combining from all of the individual permissions a user has, as well as all of the groups the user is a member of.
        Example:
        Right click FOLDER/PROPERTIES/SECURITY tab.
        • Any USER will have Read & Execute, List Folder Contents, and Read Permissions. Basically, they can double click on the folder and view the folder and its permissions, nothing else
        • Executives have the MODIFY permission. They have Write permission so they can change a folder, and they have the Modify permission, so they can also delete.
        Click on the ADVANCED button, and select the EFFECTIVE PERMISSIONS tab. Select USERS. We see the Effective permissions for the USERS. It breaks out all of the permissions so we can tell what permissions the USERS group has. If you select the EXECUTIVES group, you will see the EXECUTIVES group has even more permissions.

        Go to MY COMPUTER/Click on MANAGE/LOCAL USERS AND GROUPS. For an example, we will look at a particular user, jbrown, double click on jbrown, click on MEMBER OF. Notice jbrown is a member of the EXECUTIVES group and the USERS group. If this user is a member of the Active Directory, and the effective permissions can be calculated, you can expect the following to happen.
        Since the effective permissions for the EXECUTIVES is greater than the effective permissions for the USERS, and jbrown is a member of both of those groups, the permissions are combined.
        1. SHARED FOLDER PERMISSIONS


          The true effective permissions are a combination of the NTFS permissions and the SHARED permissions.

          If the NTFS permissions are effective locally, but the resource is not effective through the network, the user cannot get to it anyway. The SHARE opens up a gateway to see resources from another computer. When you set up SHARES, you open up a big door. The network Administrator is responsible for setting up permissions.

          For Windows XP, there is SIMPLE sharing (a view setting) and there is CLASSIC sharing.
          Right click on your FOLDER/PROPERTIES/SHARING. Simple File Sharing is typically done in a home setting. Any folders the user wants to SHARE, would be put into the SHARED DOCUMENTS folder. If you try to share anything else, the system will warn you 'Are you sure you know what you are doing?' There is no security tab. You can't control the PERMISSIONS, you only have the default NTFS permissions.

          Go to TOOLS/FOLDER OPTIONS/VIEW/Uncheck USE SIMPLE FILE SHARING/CLICK OK. Now click on the FOLDER/PROPERTIES/SHARING. Now you see an entirely different dialog box. Click on SHARE THIS FOLDER. You can allocate a Share name and put in a Comment to indicate what the resource is used for. You can also indicate a User limit for the resource. For example, if the resource takes up too much of the processor or memory, we can limit the number of users who can access the resource at the same time. We can also control SHARE PERMISSIONS from here. Click on OK and you will see a hand underneath the folder, if it is shared.

        2. MAPPING A NETWORK DRIVE & SHADOW COPY


          Windows Explorer/Tools/Map a Network Drive

          The System will ask you for a user name and password.

          There is also a tool called Shadow Copy. Right click the file/click Properties/click Previous version tab/. Shadow Copy is a great tool to retrieve a lost file without having to ask the Network Administrator to restore the file from a backup tape.

        3. OFFLINE FILES AND FOLDERS


          TOOLS/FOLDER OPTIONS/OFFLINE FILES/ENABLE OFFLINE FILES allows the computer to take advantage of OFFLINE FILES that the administrator has cached. Unless the files are allowed to be cached, this part will not work.

          The options for OFFLINE FILES are:

        • Enable Offline Files
        • Synchronize all offline files when logging on
        • Synchronize all offline files before logging off
        • Display a reminder
        • Create an Offline Files shortcut on the desktop
        • Encrypt offline files to secure data
        You can also set the amount of disk space needed for offline files.

        Click ADVANCED Settings. You can:
        When a network connection is lost
        • Notify me and begin working offline
        • Never allow my computer to go offline

        1. FILE CACHING OR PINNING


          The first time a user tries to access a resource the computer takes a certain amount of time to bring the resource to the user. After the resource is local, it can be cached. It speeds up the access to the resource the next time.

          Resources that are on the server have to be set for caching or pinning by the Network Administrator. Click on the folder/PROPERTIES/SHARING tab/Click on the CACHING button. You can set manual or automatic caching. You have to have Administrator rights for the particular share to set caching.

        2. FOLDER REDIRECTION


          Network Administrators can use Group Policy to use Folder Redirection and redirect the My Documents, Start Menu, Desktop, and Application data of users. This protects the data. It can be stored on the server where it can be backed up.

          In addition, the desktop settings can be standardized through Folder Redirection.

        Friday, June 5, 2009

        Resolving Hardware Issues in Windows XP

        Microsoft Management ConsoleImage via Wikipedi


        Managing Drivers
        Device Manager is the best place to manage drivers, the hardware that talks to the software on your computer.
        Right Click My Computer/ Manage (brings up the computer management console)
        Device Manager - Lists the categories of hardware devices
        • View devices by connection
        • View devices by resource type
        • View Resources by type
        • View Resources by connection
        Right click the device. Click properties.
        General tab.
        Device type:
        Manufacturer:
        Location:
        Device status
        This device is working properly.
        Troubleshoot.
        · Advanced Tab. Gives you the properties of the particular device type.
        · Driver tab.
        Driver Details…
        Update Driver.
        Roll Back Driver. If you roll back driver, the driver that you previously had, will be cached.
        Uninstall (Advanced).
        Microsoft tests drivers and they are called signed drivers. If the driver is changed at all the signature comes off of it. So if we only used signed drivers, we will not have any compatibility issues. However, if we only use signed drivers, we limit ourselves to the type of hardware we can use. So, we can either allow signed drivers, warn us if an unsigned driver is being installed, or you can completely block the unsigned drivers.
        Right click My Computer/Properties/Hardware/Driver Signing
        Ignore
        Warn
        Block – this is the best way to set it, so users cannot install unsigned drivers.
        Administrator option
        Make this the system default -Leave this setting unchecked, so that only the administrator or users that have permissions can install unsigned drivers.
        Storage Devices – You can assign drive letters using Disk Management to assign letters to the devices to make it easier to manage the devices.
        • Hard Disks
        • CD-ROM/CD-RW/DVD/DVD-RW
        • Floppy
        • Zip disks
        • Tape drives
        • Thumb drives
        • Compact Flash cards and Smart media
        Dynamic volumes allow you to create different types of storage for a user
        Simple is one partition.
        Spanned is more than one partition spread across multiple physical disks. They are filled one at time.
        Striped volume improves the data speed, usually more than one disk and more than one controller card.
        RAID-5 is a special kind of striped volume, Redundant Array of Inexpensive disks, a bunch of hard drives that work together and create a striped disk, plus they create parity, that is, if you lose one disks, you will not lose any data.
        Mirrored volume is two different disks with the same data. If one crashes, the other has the same data. If you have multiple controllers, it is called a duplex.
        Display Devices
        Right click Desktop/Properties/Settings
        DPI setting: (is important to users)
        Direct X
        Graphics
        Joystick Control
        Connections to computers so they can communicate with each other and work on games
        To get to Direct X info, you have to go to the System Information tool. There are two ways of getting to System Information. You can test Direct X display and Sound from the System Information Tool.
        Start/All Programs/Accessories/System Tools/System Information/Tools/Direct X Diagnostics Tool (allows you to test Direct X)
        Start/Run/msinfo32
        I/O Devices
        • Serial
        • Parallel primarily used for printing
        • USB universal serial bus, serial communication, but very fast serial communication
        • FireWire (IEEE 1394) used with cameras to transfer digital images quickly
        • InfraRed can transfer without wires, using light to transfer information, such as with a remote control, you have to be in the line of sight of the communication
        • Modem
        • Wireless
        You can build hardware profiles to turn on and off hardware devices, copy the current default hardware profile.
        Right click My Computer/properties/Hardware/Hardware Profiles
        The current profile, Profile1, is listed. Copy the profile and for example, call it Hotel Room, because you don’t want your laptop to look at the printer when you are in the Hotel room. When the computer is started, you will get the choice to go to Profile1 or Hotel Room profile. When you go to the Hotel Room Profile on the next start, go to Device Manager and disable the devices you don’t want to run for this profile. First, you could go into the profile properties for Hotel Room, and check ‘This is a portable Computer’ and ‘The computer is undocked’. That will turn off the power that would be going to the docking station.


        ACPI Advanced Configuration Power Interface
        Conserve Power for all of the devices on the computer. Compatible with Win XP Pro, Home, 2000 Pro, has to be compatible with the motherboard, in case it is a custom made pc. Hibernation and Standby conserves energy. If you have a problem when you enter or resume Standby or Hibernation, you could have outdated drivers, or they may not support power management. See the Microsoft Knowledgebase article at http://support.microsoft.com/kb/907477.
        Power Schemes can be set up for what the user is doing, like if the user is giving a presentation.
        Standby does not actually turn off, just conserves power. Don’t ever put a computer in standby in its case. Note:  I did this once and dropped the laptop while standing on the train and as a result, the hard drive was scratched, and thus destroyed.
        Hibernation maintains settings and battery. Turns off after everything in RAM is copied to a special area on the hard drive.
        Start/Control Panel/Power Options
        Power Schemes-Home /Office, Laptop, Presentation, Always On, Minimal Power Management, Max Battery, customize monitor and hard disks times to turn off
        Advanced – Options such as Show the icon on the taskbar and Prompt for password when computer resumes from standby, or, set what happens when the power button is pressed.
        Hibernate – Enable Hibernation, must have enough free disk space to hold the RAM.
        UPS – Uninterruptible Power Supply
        If you have the power options icon on your taskbar, hold down your mouse, and you can see all of your power schemes.

        Enhanced by Zemanta