Friday, June 5, 2009

Resolving Hardware Issues in Windows XP

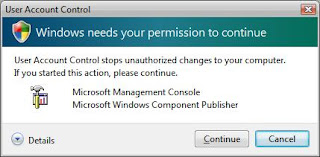
Microsoft Management ConsoleImage via Wikipedi


Managing Drivers
Device Manager is the best place to manage drivers, the hardware that talks to the software on your computer.
Right Click My Computer/ Manage (brings up the computer management console)
Device Manager - Lists the categories of hardware devices
  • View devices by connection
  • View devices by resource type
  • View Resources by type
  • View Resources by connection
Right click the device. Click properties.
General tab.
Device type:
Manufacturer:
Location:
Device status
This device is working properly.
Troubleshoot.
· Advanced Tab. Gives you the properties of the particular device type.
· Driver tab.
Driver Details…
Update Driver.
Roll Back Driver. If you roll back driver, the driver that you previously had, will be cached.
Uninstall (Advanced).
Microsoft tests drivers and they are called signed drivers. If the driver is changed at all the signature comes off of it. So if we only used signed drivers, we will not have any compatibility issues. However, if we only use signed drivers, we limit ourselves to the type of hardware we can use. So, we can either allow signed drivers, warn us if an unsigned driver is being installed, or you can completely block the unsigned drivers.
Right click My Computer/Properties/Hardware/Driver Signing
Ignore
Warn
Block – this is the best way to set it, so users cannot install unsigned drivers.
Administrator option
Make this the system default -Leave this setting unchecked, so that only the administrator or users that have permissions can install unsigned drivers.
Storage Devices – You can assign drive letters using Disk Management to assign letters to the devices to make it easier to manage the devices.
  • Hard Disks
  • CD-ROM/CD-RW/DVD/DVD-RW
  • Floppy
  • Zip disks
  • Tape drives
  • Thumb drives
  • Compact Flash cards and Smart media
Dynamic volumes allow you to create different types of storage for a user
Simple is one partition.
Spanned is more than one partition spread across multiple physical disks. They are filled one at time.
Striped volume improves the data speed, usually more than one disk and more than one controller card.
RAID-5 is a special kind of striped volume, Redundant Array of Inexpensive disks, a bunch of hard drives that work together and create a striped disk, plus they create parity, that is, if you lose one disks, you will not lose any data.
Mirrored volume is two different disks with the same data. If one crashes, the other has the same data. If you have multiple controllers, it is called a duplex.
Display Devices
Right click Desktop/Properties/Settings
DPI setting: (is important to users)
Direct X
Graphics
Joystick Control
Connections to computers so they can communicate with each other and work on games
To get to Direct X info, you have to go to the System Information tool. There are two ways of getting to System Information. You can test Direct X display and Sound from the System Information Tool.
Start/All Programs/Accessories/System Tools/System Information/Tools/Direct X Diagnostics Tool (allows you to test Direct X)
Start/Run/msinfo32
I/O Devices
  • Serial
  • Parallel primarily used for printing
  • USB universal serial bus, serial communication, but very fast serial communication
  • FireWire (IEEE 1394) used with cameras to transfer digital images quickly
  • InfraRed can transfer without wires, using light to transfer information, such as with a remote control, you have to be in the line of sight of the communication
  • Modem
  • Wireless
You can build hardware profiles to turn on and off hardware devices, copy the current default hardware profile.
Right click My Computer/properties/Hardware/Hardware Profiles
The current profile, Profile1, is listed. Copy the profile and for example, call it Hotel Room, because you don’t want your laptop to look at the printer when you are in the Hotel room. When the computer is started, you will get the choice to go to Profile1 or Hotel Room profile. When you go to the Hotel Room Profile on the next start, go to Device Manager and disable the devices you don’t want to run for this profile. First, you could go into the profile properties for Hotel Room, and check ‘This is a portable Computer’ and ‘The computer is undocked’. That will turn off the power that would be going to the docking station.


ACPI Advanced Configuration Power Interface
Conserve Power for all of the devices on the computer. Compatible with Win XP Pro, Home, 2000 Pro, has to be compatible with the motherboard, in case it is a custom made pc. Hibernation and Standby conserves energy. If you have a problem when you enter or resume Standby or Hibernation, you could have outdated drivers, or they may not support power management. See the Microsoft Knowledgebase article at http://support.microsoft.com/kb/907477.
Power Schemes can be set up for what the user is doing, like if the user is giving a presentation.
Standby does not actually turn off, just conserves power. Don’t ever put a computer in standby in its case. Note:  I did this once and dropped the laptop while standing on the train and as a result, the hard drive was scratched, and thus destroyed.
Hibernation maintains settings and battery. Turns off after everything in RAM is copied to a special area on the hard drive.
Start/Control Panel/Power Options
Power Schemes-Home /Office, Laptop, Presentation, Always On, Minimal Power Management, Max Battery, customize monitor and hard disks times to turn off
Advanced – Options such as Show the icon on the taskbar and Prompt for password when computer resumes from standby, or, set what happens when the power button is pressed.
Hibernate – Enable Hibernation, must have enough free disk space to hold the RAM.
UPS – Uninterruptible Power Supply
If you have the power options icon on your taskbar, hold down your mouse, and you can see all of your power schemes.

Enhanced by Zemanta

Security and Local Policy Settings in Windows XP


Security and Local Policy Settings
Part of keeping a user productive is keeping their data and computer safe. You can control the security if you are part of a workgroup. The tools are built into the OS in Windows XP, and must be configured on every computer that is part of a workgroup.
Local security on the desktop is controlled by the local security policies.
START/Control Panel/Administrative Tools/Local Security Policy
This brings up the Local security policy console.

Account Policies
  • Password Policy controls password settings such as minimum and maximum password age, length, and whether the passwords must be complex
  • Account Lockout Policy controls whether the account should be locked out after a preset number of logon attempts
Local Policies
  • Audit Policy determines what you are auditing for a user and the activities are posted to the Event Log
  • User Rights Assignment controls who is allowed to perform actions on a computer such as backing up the computer, changing the time, or shutting down the computer
  • Security Options have to do with what a user can do and what their accounts are limited to doing regarding access to the computer resources

Unattended Installations in Windows XP

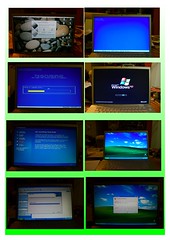
Windows InstallationImage by yewenyi via Flickr
 Unattended Installations


There are several ways to automate Windows XP installations:
1. Network Administrators set up unattended installations. Network Administrators use a program named Setup Manager to set up answers to questions that are asked during Windows Installation setup. This is done in a text file called an answer file which Windows XP Setup uses to pull common information for the installation. A UDF file is also created along with the answer file. The uniqueness database file answers questions that are unique to each computer, such as the computer name.
a. Answer file answers certain questions, mainly a babysitter file.
b. UDF is a uniqueness database file. The UDF overrides the answer file. It is for the specific computer. You can have one answer file and many UDFs.
2. Imaging. There are 3rd party tools, such as Ghost or Altaris that can make an electronic image of the computer. They take a picture and then they can reproduce the picture somewhere else. The Network Administrators set that up.
3. RIS. Remote Installation Server. Create an image on a RIS server and an automated installation can be done to the computer through the network. An RIS client connects to the RIS server and downloads the computer specific image. Network Administrators set that up.
Computers that have a Preboot Execution Environment (PXE) compliant network adapter, you can start the computer from a server on the network to begin the Windows XP Installation automatically.
Computers that do not have a PXE compliant network adapter must be started with a RIS disk file supplied by the network administrator. The RIS disk file contains the necessary drivers and emulates the PXE environment, so the installation can continue automatically.

Enhanced by Zemanta

Installing Windows XP


Three methods to installing Windows:


1. Clean install – no existing OS present
2. Upgrade – has existing OS, but installs better OS, maintains applications
3. Multiboot installs – more than one OS on the same computer


Minimum hardware requirements for Windows XP:


233 MHZ Processor or better
64 MB Ram
1.5 GB of free disk space (400-500 mg needed to install the OS)
Super VGA display

You should run the Windows XP Upgrade Advisor before upgrading your system. Connect to the Internet prior to running the Upgrade Advisor. The Upgrade Advisor will let you know about compatibility issues, such as outdated drivers, and let you know if your hardware is sufficient and if you have any software installed that may not work properly after the upgrade.

If you have compatibility issues on your computer with hardware, device drivers, or software using Windows XP, check Windows catalog on the web.


Microsoft.com/windows/catalog

Designed for Windows XP, means it was tested with Windows XP. Compatible with Windows XP means it might work, hasn’t been tested.


If it is not in the catalog, that means it probably won’t work.

You can find the Windows XP Upgrade Advisor at the following sites:

http://www.microsoft.com/windowsxp/home/upgrading/advisor.mspx

http://www.microsoft.com/windowsxp/pro/upgrading/advisor.mspx

Check the BIOS compatibility either on the MS site, or the 3rd party manufacturer site. The BIOS resides in a special area of permanent memory. If the system has an outdated BIOS, it can cause problems with the Windows operating system. You may have to supply an updated BIOS prior to installing the Windows XP upgrade.

There is a tool built into the system called the Upgrade Advisor. The Upgrade Advisor allows you to check the compatibility of the system. The Upgrade Advisor is included on the install disk.

Make sure you have updated drivers.
The best place to get updated drivers is on the 3rd party manufacturer’s website.
Drivers are the software that allows the hardware to communicate with the OS.
Hard disk: physical medium where you can store data.
Partition is an area of the disk that is set aside and defined.
For example, the C drive is a partition on the disk.
A volume is a group of partitions, one or more, that are set aside and defined. It can be on the same disk, or multiple disks. A volume can span across several disks. Chances are you won’t have spanned volumes in client computers.
Creating Partitions.
Three types of file systems:
1. FAT: File Allocation Table (released with Windows 95). Older systems like Win95 or Win98 use FAT. FAT has a file allocation table that defines where the files are. The files are broken into pieces like a pie. Win95 and Win98 cannot use NTFS.
2. FAT32: File Allocation Table for 32 bit OS (released with Windows 95b). Newer systems use FAT32 or NTFS. FAT32 more efficient than FAT. Stores more info into less space.
3. NTFS: NT File System. Can store info into even less space, but you also have security with NTFS files.
How to create partitions:
1. Command line tools
2. Built in tools on WinXP can be used to create partitions.
Partition information is stored in the master boot record of the hard drive and is separate from the operating system.
Win98 has a startup disk created from a Win98 computer.
Win2000 and 2000Pro, Microsoft chose not to give you a start up disk.
WinXP, Microsoft gave you a DOS start up disk. Click on My Computer/right click the floppy drive. Insert floppy. Click Format and Create MSDOS startup disk. The system copies 13 essential files. Will not have all of the tools you need. You should find a Win98 system and create a startup disk, because that will have many more tools that you need for troubleshooting like FDISK and FORMAT. You should have this disk with you when troubleshooting. You can use the startup disk to create and format partitions. Allows you to start the computer, then, you use the CD-ROM on that computer.
How to start the computer with the Windows98 startup disk:
1. Insert the Win98 startup disk into the floppy drive
2. The system will ask you if you want to start with CD-ROM support.
3. The system creates a virtual disk and puts some files on the virtual disk. It continues to load a very basic OS.
4. When the A: prompt appears, type dir and take a look at the directory of files, particularly FDISK.
5. Type FDISK, press enter.
6. Do you wish to enable large disk support? Larger than 512 MB? Type Y.
7. Type 4 to display partition information.
8. Type 1 to Create a Primary DOS Partition. It will verify the drive integrity, before setting up the partition (the logical divide of the disk medium)
9. A message appears, ‘Do you wish to use the maximum available size for the partition’. If you want more than one partition, type N and press enter.
10. How much space do you want to use? Example: Create a small partition, 1004 MB.
11. Choose 2. Set the partition as active. Press Esc. Press Esc. Press Esc.
12. When you reboot, the computer will be able to see the C drive.
After you get the computer started, you can use the WinXP CD to create and format partitions. You can use the WinXP CD to find the partition you just created, delete it, then, create a new partition.
When you insert the WinXP CD, the OS will look at the computer and determine how much partition space is available. The steps are as follows:
1. Copy files into the system.
2. Do you want to install or do a repair? R is recovery console.
3. Press enter and Press F8 to agree to the installation
4. The C partition that you created, 1004 MB, appears with the remaining unpartitioned space.
5. Press D to delete the partition that you created previously with the startup disk.
6. Confirm your deletion, by pressing L.
7. Press C to create another partition.
8. For this example, create a 2000 MB partition and press enter.
9. Press enter to install.
10. Format the disk with FAT or NTFS? You can only use a QUICK format if the disk has already been formatted before with that particular file system.
The Installation Process.
The four major phases of an OS installation:
1. File copy. The CD gives up all of the required files to the hard drive into a temporary folder.
2. Text mode setup. The system starts asking questions like do you have partitions, do you want to create and format partitions? Text mode completes and restarts your computer.
3. GUI mode. Time zone, computer settings, computer name, workgroup or domain. The computer restarts.
4. Windows Welcome. Means the OS is installed.
You can use typical or custom settings. You should be aware that if you are having trouble with an installation, it could be because of custom settings. You should back out of the custom settings and use the typical settings to get back to a good OS, before continuing.
Once the OS is functional, Microsoft will ask you to activate it. If you have an internet connection, you can go ahead and activate over the internet. If not, you can activate over the telephone.
Windows Update.
You should set your computer to get Windows updates for the OS, automatically.
Right click My computer/click Properties/Automatic Updates.
If the computer is part of a domain, Automatic Updates is probably controlled through Group Policy. They might be using a SUS server (system update server) to rollout the updates.
Multiboot Installation Considerations

If you want to do another OS installation, it will see the original OS, and ask you if you want to install over this OS, or install a new OS. Install the OS that is lowest in the hierarchy, first. For example, WIN98 is before WINXP.

The boot.ini file determines where the system looks for the OS. The user gets to select the OS at startup.

Resolving Setup Issues

Sometimes installations don’t go as planned. The easiest way to fix a failed installation is to reinstall.

1) If the system is working pretty well, you can insert the WINDOWS CD, and let the system ‘autorun’ the CD.

2) If the system will not recognize the CD, restart the computer after inserting the CD into your CD-ROM drive. You should be able to reinstall an OS on top of another OS without losing the data, unless, you have to Reformat the drive. Always backup your important data. Make sure the CD-ROM drive is ahead of the hard drive in the BIOS settings.

If you have a setup failure during the early portion of the installation because of missing or unsupported devices, press PF6 when prompted to supply the necessary drivers from a floppy disk supplied by the manufacturer.

If you get errors accessing the CD, clean the CD, or try another installation CD.

In case the OS installation fails, you can examine these files to troubleshoot:

1) Setuplog.txt has a list of each task performed during the installation.

2) Setupapi.log has a list of hardware and drivers detected during the installation.

3) Setupapt.log logs all of the actions taken by the person doing the installation.

4) Setuperr.log is only created if there was an error during the installation.

Most of the time, these files will be in the WINDOWS root drive.

Transferring User Information.

What if you want to transfer the settings on one computer to another: Use the USMT tool, User State Migration tool. This can be used whether the computer is a member of a domain or a workgroup.

For workgroups, use FSTW, the Files Settings Transfer Wizard. This allows you to transfer the user’s settings as well as their files. Cannot use if your computer is part of a domain.

FSTW: START/All Programs/Accessories/System Tools/FSTW

1. Get on the Old computer. Get the files from the old computer to new computer.
2. Transfer by direct cable, floppy or other removable media.
3. Transfer to removable drive or network drive. You can do this in two steps, files and then settings. The easier way is to transfer both files and settings.
4. Click Next and wait for the file is created.
5. Get on the New computer, and go into FSTW.
6. Select New computer. Click Next.
7. Select 'No you don’t need a wizard disk' because you already created one at the beginning of the process.
8. Where should the wizard look for the items you collected? Select the way you created the files to be transferred to the new computer, removable or network drive.
9. Click Next and wait for the wizard to transfer the files.


Related articles by Zemanta
Five Reasons It's Time to Switch to Windows 7 (pcworld.com)

Enhanced by Zemanta