 Image via Wikipedia
First, go to Open Office and download your free productivity suite.
In the past, I addressed all my Christmas labels by hand. What a pain. After spending way too much time on doing THAT this year, I finally figured out how to do a Mail Merge to create address labels using Open Office. The reason for using Open Office is, it is free, as I do not have Microsoft Office on my laptop and I hate to pay for something I can get free. If you are used to Microsoft Office Mail Merge, you might have some difficulty, but follow my instructions for using Open Office, as I have condensed the instructions into an easy to understand format, I hope.
If you have any confusion, use the Open Office docu Using Mail Merge to follow along with my instructions. Both documents together might clear up any questions you have. After you have downloaded Open Office and saved it to your desktop:
1. Click on the OpenOffice Icon on your desktop:
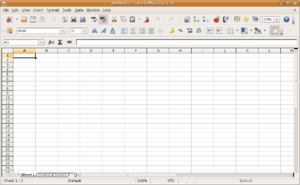
2. First, you must create a data source and register it. A data source is a database containing your name and address records. One way of doing this is to create a spreadsheet of your name and address records including the column headers. I used Open Office Writer to create my spreadsheet. To create your data source, click File, Wizards, Address Data Source.
3. Click the appropriate type of external address book (in this case, Other external data source). Click Next.
4. Click Settings. The data base type says DBASE, but don't select that. Click the drop down arrow and select the Database type (in this case, Spreadsheet). Click Next.
5. In the next dialog, click Browse and navigate to the spreadsheet that you created that contains the address information. Select the spreadsheet and click Open . Test that the connection has been correctly established by clicking on the Test Connection button.
6. Click Finish.7. Click Next. Do NOT click Field Assignment.
8. Name the file that you want in the Location field. This is the name you are using to register the data source. The default is...\Addresses.odb; but you may replace Addresses with another name if you so desire. The “Address book name” field may also be named whatever you desire.
9. To register the data source, click Finish.
Now it's time to print the mailing labels:
1) Click File, New, Labels.
2) Go to the Options tab and make sure the Synchronise contents checkbox is selected.
3) Go to the Labels tab and select the Database and Table. The Table is the sheet name that is in your spreadsheet. The database is the data source you created in the Location field in step 8. Select the Brand of
labels to use, and then select the Type of label.
4) Click the dropdown arrow under Database field. Select the first field to be used in the label (probably Firstname). Click the left arrow button to move this field to the Label text area.
5) Continue adding fields and inserting desired punctuation, spaces, (comma after city) and line breaks until the label is composed.
6) Click New Document. You now have a new, single-page document containing a series of frames, one for each label of the selected type and filled with the data source address fields that you selected.
We selected Synchronise contents earlier. You should now be able to see a small window containing a button labeled Synchronise Labels.
7) Click File, Print. The dialog box will say "Your document contains address database fields. Do you want to print a form letter?" Click Yes.
8) In the Mail Merge dialog, you can choose to print all records or selected records. To select records to be printed, use Ctrl+click to select individual records. To select a block records, select the first record in the block, scroll to the last record in the block, and Shift+click on the last record.
9) Click OK to send the labels directly to the printer. If you prefer you can save the labels to a file to allow editing. If so, select File in the output section of the Mail Merge dialog, rather than using the Printer selection. When you select File, it highlights the Save merged document section, where Save as single document is selected. Clicking OK brings up the Save as dialog, where a file name can be entered for the saved labels.


Thanks for the help! One question I have is do I have to create a new table every time I update information in the spreadsheet? No matter how I save it it seems to not recognize the new data unless I create a new table.
ReplyDeleteI was fine up until step 8 - I don't know how to actually merge the master label that I created with my actual spreadsheet and print labels. This whole step by step instruction was wonderful - thanks so much. I just don't know where to go from here. I don't see a mail merge dialog other than under TOOLS where there is a Mail Merge Wizard but that doesn't let me print labels. Thanks again!
ReplyDelete